


Product Description
PL22-40W
PL22-40W LED Panel light is the newest innovation in indoor overhead lighting and is unique in several aspects: it is highest in quality, size can be customized, boasts long lifespan totaling 10 times that of fluorescent lamps, and power consumption is substantially less than recessed fluorescent lighting. It has 0-10V dimming function available, making it perfect for offices, classrooms, commercial complexes, homes, and conference rooms.
Applications
Office/Factory Buildings
Hospitals and Hotels
Schools, Colleges, and Universities
Conference/Meeting rooms
Subway stations
Commercial complexes
Residential lighting
Rated Power | 40W |
|---|---|
Efficiency of Light | Typ. 108 lm/W |
Rated Voltage | AC 100-277 V |
Rated Frequency | 50/60Hz |
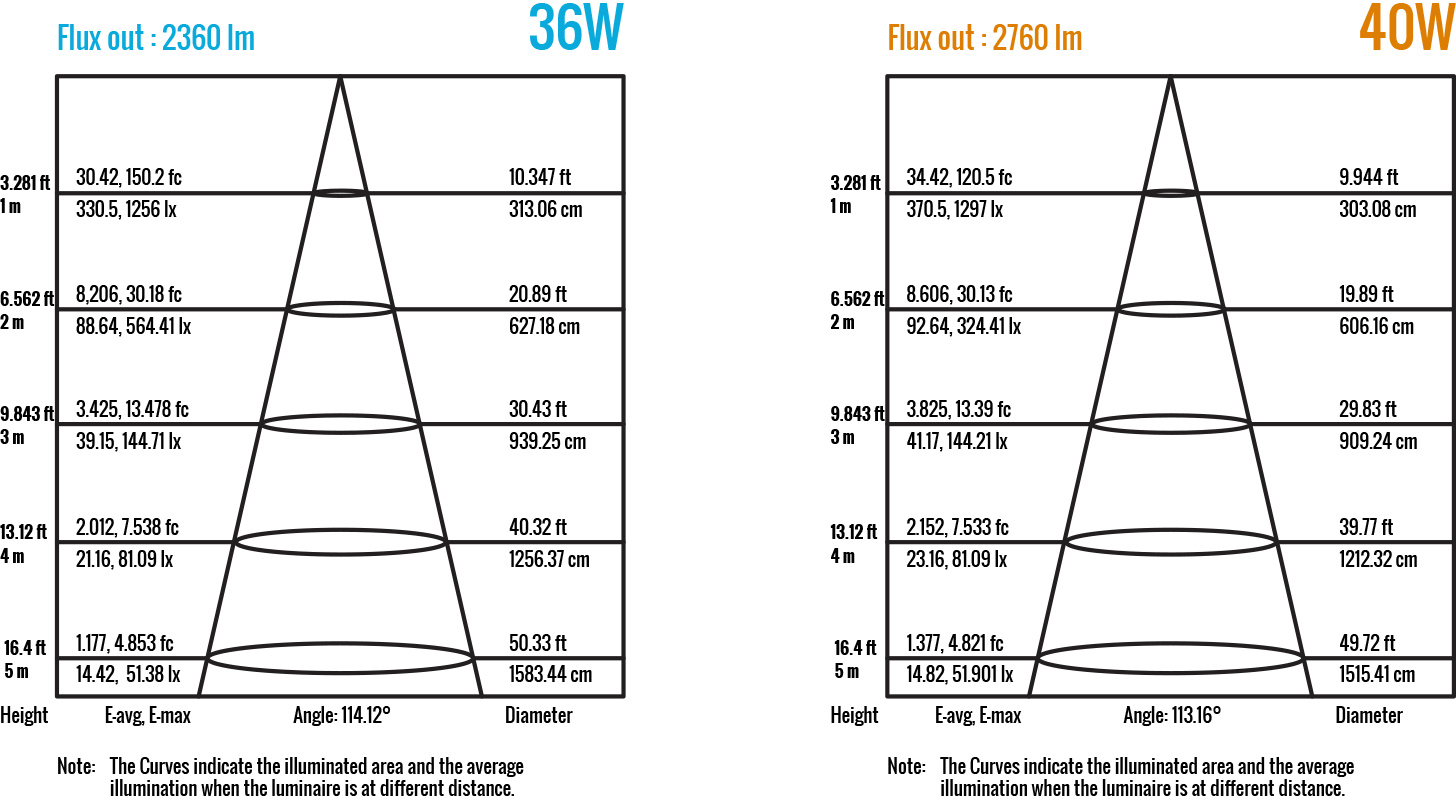
Total Luminous Flux | 4345lm@5,000K |
CRI | Ra>82 |
Dimmable | Yes (0-10V) |
Color Temperature | Typ. 4,000 K / Typ. 5,000 K |
Angle of Beam Spread | 112° |
LED Type | SMD2835/288pcs |
Power Factor | Above 0.9032 |
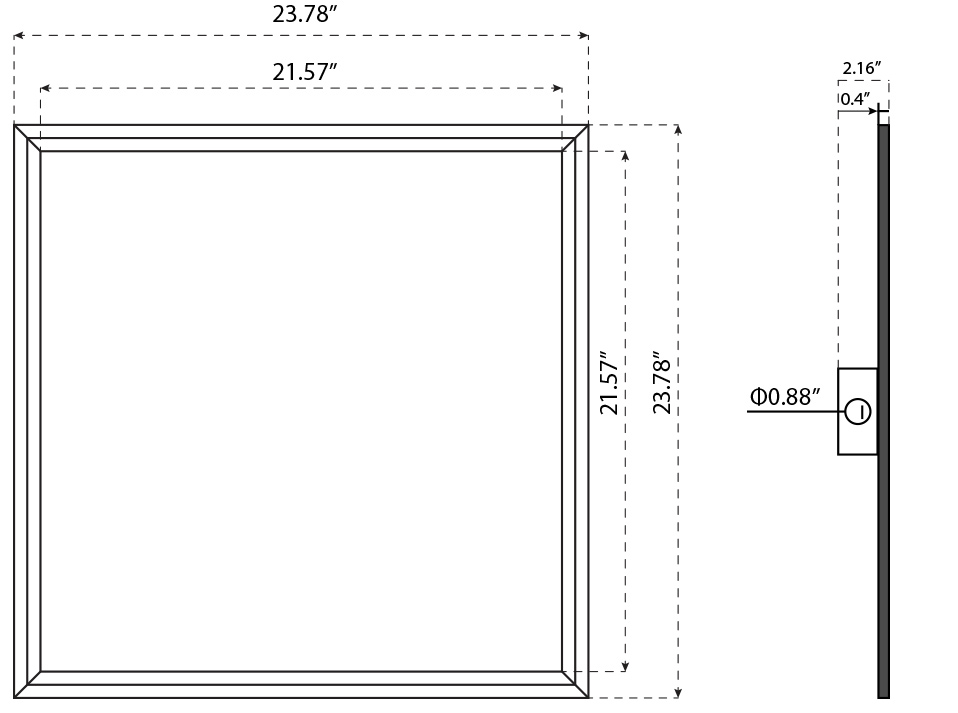
Dimension | 23.78" X 23.78" |
Operation Temp. | - 40°-104°F |
Safety Certificate | UL/cUL: E471261 |
Energy Saving Qualification | DLC |
Life Time | 50,000 hours |
Warranty | 5 years |